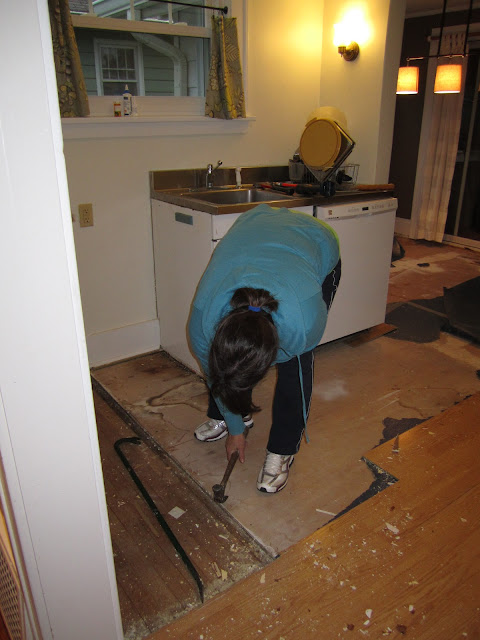
Welcome to my kitchen. This space was small, cramped, and OLD. The oven door couldn't open all the way because it hit the refrigerator door and the refrigerator door couldn't open all the way because it hit the stove door. The flooring wasn't bad, but it was about an inch higher than the floor in my living room. The space was so awkward and it needed to go. I love to cook and this kitchen made it difficult. I knew that someday I would gut this space, but in my mind someday...was a long time from now. Sure I wanted to have a nice new kitchen, but my tiny budget wouldn't allow for new cabinets, appliances, trim, paint, flooring, etc, etc, etc, right? Plus I couldn't handle a kitchen remodel, I mean who was I kidding!?! It's like they say though...all you need is just twenty seconds of insane courage. That courage came in the form of two hammers- one in my moms hand and one in mine. Once we started hammering away there was no going back.

This is my sister Allison (aka Heart) rocking some pretty NICE looking safety glasses!
Heart's husband Nick
This is my Mom. She doesn't like having her picture taken ;)
We tore up layer upon layer upon layer of flooring trying to get down to the original oak. This. Was. A. Project! I don't even know how many hours I spend on these floors, but I love the end result and I'm so happy I refinished them.
Here is the beast like sander that I rented from The Home Depot. This thing is tough and will tear through just about anything.
Drywall is done.
Finally cabinets start to go in!
Countertop and lighting came next :)
Next up...tile backsplash. I love love LOVE how this turned out.
This is the original kitchen door after I sanded and stripped it. I'm really happy with how it turned out! Boy was it a lot of work though!
I fell in love with this light fixture and these knobs from Restoration Hardware. They were a tad...ok a TON over budget but I am so glad I went with them. I just love how they look in this space. I'll blame these two purchases on my friend Bryan who encouraged me to "go with what I loved". When i told him I had gone way over budget he said this was payback for me encouraging him to "go with what he loved" during his basement remodel. :)
The kitchen is finished now! Well for the most part...is any room ever really done though?? Sure I need to add curtains to the window, and artwork to the walls, but my house back in order...I have a stove to cook with...a sink to wash dishes in, and...oh...REAL plates, cups and silverware! It's the little things...
So what do you think of the transformation? It's a big change, right?


