Saturday, April 6, 2013

SPRING WREATH


Hey hey!!  It's finally starting to feel like Spring in Iowa.  I celebrated by taking a little day trip with my Grandma, Mom, and one of my sisters.  We had lunch at the cutest little cafe and then checked out a few of the local shops.  I finally found a little shop that carries Annie Sloan Chalk Paint and I'm ohhhh so excited to get started on a little projects I've had in mind for a couple of months, but I'll save that for another post.

Today I'm sharing a Spring wreath I made.  I was a total procrastinator on this project.  I started painting the eggs, ohhhhh about three weeks ago and then lost steam.  Pretty sad, right?  

Ugh, am I the only one that does stuff like that??  

BUT, I finished it today and I'm really happy with how it turned out.  I didn't take very many pictures along the way, but it's super simple so I'm sure you can figure it out.  ;)

I started with a basic grapevine wreath, three cardboard eggs, Martha Stewart craft paint, and a bag of Spanish moss.

I didn't end up using the brown paint color in this picture.  I was going to use it to speckle the eggs but decided against it once I had a 'speckle fail' with an old toothbrush. 


I picked up the spanish moss from Dollar Tree.


I used the blue and yellow paint from the Martha Stewart line and then mixed the two colors to create my green.  I didn't end up using the brown metallic color ...


Sorry for the blurry picture here.  This is a $0.49 cardboard egg  I picked up at Hobby Lobby.


This is where I drop the ball on the how-to pictures.  Very sorry for that :(

I think the rest is pretty self explanatory, but send me an email if you have any questions. 


I'm really happy with how it turned out.  So bright and Springy :)  Hope you have a fantastic weekend!!  See you soon.

Saturday, March 2, 2013

MY LIGHTING CONTROL SYSTEM

In one of my last post I talked about mood lighting in my kitchen.  I mentioned I would talk more about the lighting control system I use in my home so today I wanted to share about it in a little more detail.  I am in no way affiliated with X-10 and am not being paid to say these things.  This is just the method I use in my home and have grown to love.

I think lighting is one of the most important things you can add to a space and it's one of the easiest ways to set the mood in your home.  My house is old and that means no cool recessed lights in my ceiling.  No way, Jose...I have lamps...lots and lots of lamps.  When I first moved in to my house I would walk in to the living room, turning on each lamp individually.  It wasn't a huge deal, but with six lamps it took me a while to turn them all on.  :)  A friend of mine told me about a lighting control system that I fell in love with.  It's nice because you can turn on all the lamps in a room with the touch of ONE button plus it makes all of your lamps dimmable.  Major bonus!

Now wait just a second...before you tune me out...I promise it's super easy!  :)  I did it and I promise you can do it too!

You'll need two things: a plug in controller and a lamp module for each lamp you want to control.  I ordered all of my supplies on Ebay.

Plug-In Controller (MC10A)


Lamp Module (LM465)

Step 1:  Assign a frequency to the controller by turning this dial.  My living room is set to "C".
 

Step 2:  Assign the lamp module to the same frequency.  Again, in my living room that is "C".


Step 3:  Assign each lamp a number so you can control them individually.


 Step 4:  Plug in your lamp cord to the bottom of the lamp module.


Step 5: Plug in your lamp module and your controller and you're all set.

 
See...I told you it was simple.


Disclaimer: I am in no way affiliated with X-10, just a girl who has used and loved their products.


ISN'T THAT PINTERESTING

I spend a lot of time on Pinterest and I thought I would start sharing some of my favorite posts with you.  Every Saturday I'll be sharing some of my favorite Pinterest projects and inspiration for the week.  You can check out the rest of my boards here.


I have an awkward space between the top of my refrigerator and the bottom of the cabinet that hangs above it.  You can see it here.  Anywhoo...I was thinking this would be the perfect spot for a single row of wine storage and I love the look of this.  I LOVE mixture of materials they used too.


How to boil the perfect egg...hmmm.  I haven't tried this yet, but I was intrigued by the post about hard boiling eggs.  I'll definitely be giving this a try come Easter. :)


I thought this landscaping was beautiful.  I'm a "color" girl and the mixture of colors in this landscape is just perfect!


I absolutely loved this tutorial on making your own speckled eggs.  These are just too cute to pass up.


This just screams fall to me.  I can just picture sitting out there with friends and family enjoying a beautiful Iowa fall night.


See all of my pins by following me on Pinterest.

Happy Saturday :) 


Saturday, February 23, 2013

KITCHEN MOOD LIGHTING

This past summer when I remodeled my kitchen I wanted to add under and above cabinet lighting.  I didn't want to spend a fortune paying an electrician to do it so I opted to have the electrician add a few extra outlets above my cabinets so that I could add lights down the road.  This is a really simple project that I think anyone could do.

I decided to use small, halogen puck lights for under my cabinets.  I picked these up at Menards for around $20 I think.  I love that these are small, blend in well, and they clip together easily.  Also, they are dimmable which is a HUGE plus.

The pucks come with VERY tiny screws to secure them to the cabinets.  I found this to be the hardest part of the entire project!  Seriously, I probably dropped that darn screw 100 times.  Picture this:  I'm holding a heavy drill above my head, practically laying on my back on the counter, trying to balance this tiny screw...didn't go so well.  Take my word and PRE-DRILL tiny holes.  You will save yourself A LOT of frustration if you do this first.  :)


Next, I drilled holes in between each cabinet to thread the cords through.


All of my cords plug in to outlets above the cabinets so I ran the cords up between the end of the cabinet and the wall.


For the tops of my cabinets I used rope light.  I ordered mine on Ebay but I think you get get it at a lot of places.  Make sure you get either the exact length you need or get the rope light that is cuttable.  I didn't secure the rope light at all, just laid it up there.  Oh and never plug your rope light in while it's all coiled up.  I did and it all melted together.  I had to re-order all of mine :(


I use a lighting control system called X10.  I won't go into a lot of detail now (I'll write up a more detailed post at a later date) but basically each cord gets plugged into a module- pictured below.


Then I can control all of my lights by this handy dandy remote.


I love the way the lights look at night.  These aren't the best pictures but you get the idea. :)


Disclaimer: I am not an electrician...this is just the way I installed my lighting. :)

ISN'T THAT PINTERESTING

I spend a lot of time on Pinterest and I thought I would start sharing some of my favorite posts with you.  Every Saturday I'll be sharing some of my favorite Pinterest projects and inspiration for the week.  You can check out the rest of my boards here.


I love this space.  It's so light and bright and just makes me think about summer.  I have never wanted to paint a room white before, but now I'm considering it!


I thought this wreath was super cute.  It would be so easy to make too and really inexpensive.  I'm holding on to this idea for my sisters baby shower.  :)


I thought this was a really good tutorial on making a envelope pillow cover.  I really wish I had seen this a few months ago.  I sewed my pillow inserts in to the pillow covers I made.  Bummer...what was I thinking?? :)


This Etsy shop has the cutest artwork.  I just loved this sign!


See all of my pins by following me on Pinterest.
Happy Saturday :)


Saturday, February 16, 2013

ISN'T THAT PINTERESTING

I spend a lot of time on Pinterest and I thought I would start sharing some of my favorite posts with you.  I've never done a "series" before, but I'm going to give it a try.  Every Saturday I'll be sharing some of my favorite Pinterest projects and inspiration for the week.  You can check out the rest of my boards here.


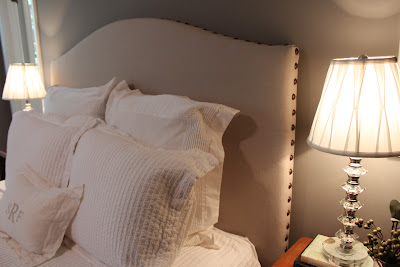
This is a great tutorial on making your own tufted headboard.  I would love to do this in my bedroom.


I also loved this DIY headboard with nailhead trim. Isn't this just gorgeous!


Isn't this space stunning?  I love the lighting in this room and I adore the the wood beams in this ceiling.


I've been wanting to host a craft night for some time and this wreath might just be the ticket!  I thought it was so cute and it doesn't look like it would be very hard to make.


I'm normally not into abstract art, but I absolutely loved this painting.  I think the use of color is perfect.  It's such a happy piece.  I'd love to find a spot for it in my house.  Hmmmm...


See all of my pins by following me on Pinterest.

Happy Saturday :)

MY NEW BESTIE

I think it's safe to say I'm a coffee nut and I especially LOVE Starbucks.  The folks at my local Starbucks are great and they already know what I'm going to order when I pull up and they are super friendly.  I can't say enough about them, they're fantastic.  The problem is, it was getting pretty expensive to go there every day and I started feeling guilty about my monthly coffee budget, so a couple of months ago I started researching espresso makers to find a solution that would still allow me to have good coffee in the morning, but hopefully cut down on my monthly coffee budget.

After a LOT of research I opted for a Nespresso Pixie with milk frother.  The thing I love about this machine is that it's fast (only takes me about a minute or less to make a latte), it make really great espresso, and it's compact (my kitchen isn't very large).

The initial investment wasn't cheap but compared to some of the other models out there it's not bad at all.  The machine uses pods and each pod is only sixty cents...much better than my $5.35 I was spending at Starbucks.

I've had the machine for a couple of months now and I've been really happy with it.  It is my new bestie! :)


P.S. This post is in no way affiliated with Nespresso or Starbucks, just a girl that loves my new espresso machine AND Starbucks.  :)